
Management via USB
As soon as it is programmed, OMC21 is still connected to the USB port and immediately one may have an urge to test it without further wirings, by using the PC to send commands. As an example, let’s see how to build the three data bytes for the motors’ control, in the case we wanted the motor 1 to go in a forward direction with 50% power and braking function activated, and the motor 2 to go in the reverse direction with 25% power without braking (standby). Since the speed is expressed as a numeric value between 0 (0% power) and 255 (100% power), the two values, 50% and 25% correspond respectively to the decimal values 128 and 64. Byte2 will have to be built, bit by bit, as shown in table.
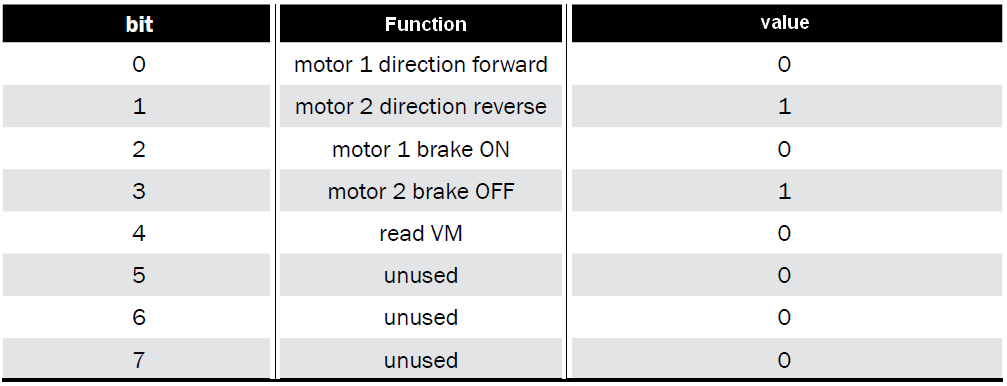
The three command bytes will then be the ones shown in table .

If our controller is connected to the serial port, we will hardly control it by using Arduino’s SerialMonitor function, for the simple reason that the first 31 ASCII code characters cannot be printed, since they are used as commands with regard to the communication with printers. If we want to send the four so-built bytes, it is needed to use a serial monitor that enables the management of the characters that cannot be printed as well; in our case we used a free software, distributed in a portable version and named SSCOM, but there are many others available on the Internet. In the example the bytes 0x24 0x10 0x8F 0x00 have been sent (red circle) and they correspond to the stopped motor 1 and to motor 2 going forward with 56% power, and to a request for the VM supply voltage.
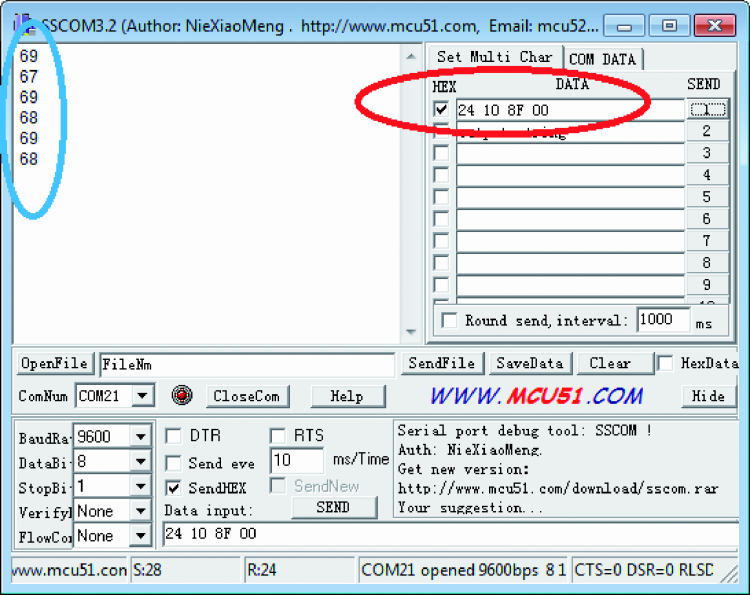
The response data regarding a supply voltage of about 6,8 volts is highlighted in blue. If, on the other hand, you want to create your own management software, we advice using Processing, that will allow to easily use a serial communication via USB: a sample sketch is found in Listing 3. In this example, an item of the serial class is simply created, then at the start of the sketch the port is opened and, as soon as any point is clicked, the four bytes are sent, as needed by the OMC21’s command. Since there is no drop down menu to choose the COM port from, it is specified by means of the portName = Serial.list()[0] code line, in which we need to indicate the index corresponding in the list of the COMs that are installed on the PC. If you do not have any COM hardware and Arduino alone is connected to the PC, as it often happens, in the list you will find a single COM whose index is zero.
Listing3


