Let’s go on, therefore, by expanding the starting example a bit, in order to interact with the hardware; after all one of the main purposes of what we are examining is just to supply a simple and powerful tool to the Makers.
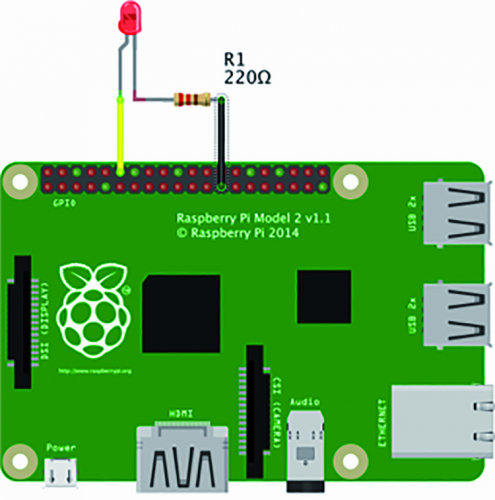
What we want to do now is to try to turn on a LED, via a click on a button displayed on the monitor’s screen. For this example we should connect a LED to one of Raspberry Pi’s GPIOs: we will use pin 18.
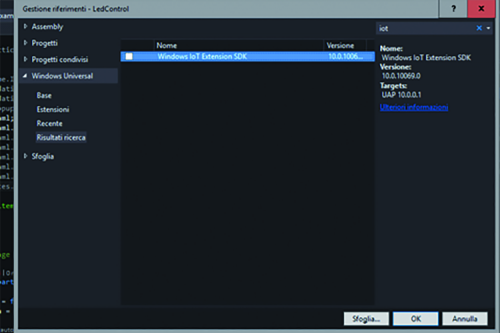
Given that we haven’t yet interacted with the board’s hardware, we didn’t consider the package needed to do that until now. To do that, as a first thing, let’s click with the right mouse button on “References” (while in Visual Studio’s “View Solution Explorer”) and let’s make the context menu appear. From it we will select “Add Reference”, once a dialogue box appears with a list of entries on the right. Let’s select “Windows Universal” and type in “IoT” in the search text box that is up and on the right; in this way the list should show us a single element: “Windows IoT Extension SDK”. Let’s select it and click on OK, in order to install it.
The “Windows IoT Extension SDK” package offers us all the specific extensions needed in order to work with the hardware; of them we will use the classes that enable the interaction with the board’s GPIOs.
Let’s start, therefore, to modify the code, in order to adapt it to the new needs: as a first thing we will modify the XAML file in order to create the interface we want; the content of MainPage.xaml will be as shown in Listing 2.


