[tps_header][/tps_header]
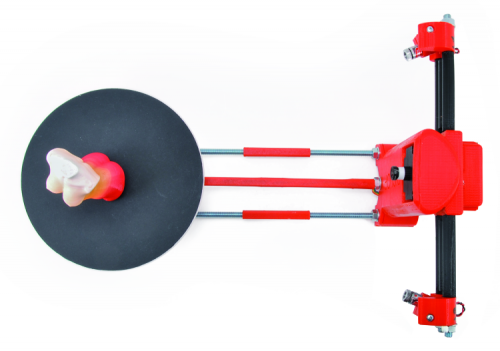
By making use Raspberry Pi, we created an easy to build 3D scanner to be used for the acquisition of three-dimensional models via a video camera and a laser.
3D printing keeps on establishing itself, mostly thanks to the availability of more user-friendly 3D printers and price drops. Those who use a 3D printer do it both for printing a original models of their work (such as for example, the scale model of a building or the replica of mechanic particulars), and to print items modelled from others for which STL files are often available. In order to reproduce an item – if the STL is not available – you will have to create it, and there are two ways to do it: either using a 3D modelling tool or by acquiring a 3D drawing for the item, by means of a specific three-dimensional scanner. 3D Scanners are used in various fields, going from industry (for the copy of an object, starting from a model, a mould or an item to be replicated) to medicine (it is used, for example, by dental technicians so to scan the mouth’s cast and pilot CNC machines or 3D printers with which to build dental crowns and tooth caps, but also for the modelling of orthopedic implants). The scanner is also needed to acquire an object’s model and to remotely send it, where a 3D printer may replicate it; this is needed, for example, if it is necessary to send a sample from the other side of the world, but you cannot wait for the times needed by the couriers.
3D scanners are also used in order to acquire three-dimensional models of sculptures, archaeological finds, etc.
A 3D scanner is a very sophisticated equipment, and a decidedly expensive one, not really within everyone’s means. Luckily, the technology it is based on may be replicated – even with a limited expenditure – as we will show you in this article, in which we will propose the construction of a scanner based on Raspberry Pi 2, the well-known prototypation board.
TECHNICAL FEATURES
- 5 megapixel video camera
- Colour scan
- Up to 6,400 steps per plate rotation
- 0.25 mm resolution
- Scannable volume 200 X 200 X 150 mm
- Assisted calibration
- Power supply’s voltage: 12 Vcc / 700 mA
The technology
Nowadays there are different solutions for carrying out a scan: structured light, laser and video camera as for visible light or IR, video camera only. The structured light technology offers excellent results but involves a complexity and costs that not always may be acceptable ones, while the ones that proved to be the most affordable ones are the laser technology plus video camera and the video camera one: in the first one, that is the one you will see applied to the project in this article, one or two lasers draw a vertical line on the area to be scanned, and a video camera shoots the surface lighted by the laser. On the other hand, the technology using only the video camera is based on acquiring a certain number of frames “shot” at each turn carried out by the object to be scanned on a turning plate: the greater the number of frames per turn (the camera’s resolution being equal), the better the scan’s sharpness. A powerful software will then process the pictures, it will recognize the common points and will reattach them together as if they were photographs of the same object from various points of view, and until the reconstruction of a three-dimensional model on the PC screen (that is then converted in STL) is completed. With respect to the video camera only technology, the one using the laser plus the video camera has the following advantages:
- a greater image contrast, since the shootings on the video camera are obtained from the laser’s light reflection, therefore the image acquired is a good one, even with little light;
- it allows a greater detail, due to the fact that it does not analyze a single frame, but a very luminous line on the object’s surface, therefore it allows to detect even a slight roughness on the surface, and to supply a better image of the shape variations;
- it manages to acquire a scan even for items having an uniform surface and form;
- it does not require the application of a background to the scene to be shot;
- it requires less calculation power for the construction of a three-dimensional model.


